Images ↩
Description
Each glyph layer may include a bitmap image for reference – for example scans of drawings or printed typeface samples for digitisation.
Adding images
To add an image to the current layer of the current glyph, drag & drop an image file from Finder into the Glyph View. Image formats .png, .jpeg or .tiff are supported.
Each layer can contain only one image.
To add multiple images to a glyph, use multiple layers (one for each image).
Imported images are stored in an images directory inside the UFO3 font.
Removing images
To delete an image, select it with the Editing Tool, and press the backspace key.
Transforming images
Images can be freely moved, scaled and rotated using the Editing Tool. To activate Transform mode, select the image and use the shortkeys ⌘ + T or choose Glyph > Transform from the main application menu.
Images can also be transformed using the Set Scale sheet.
Contextual menu
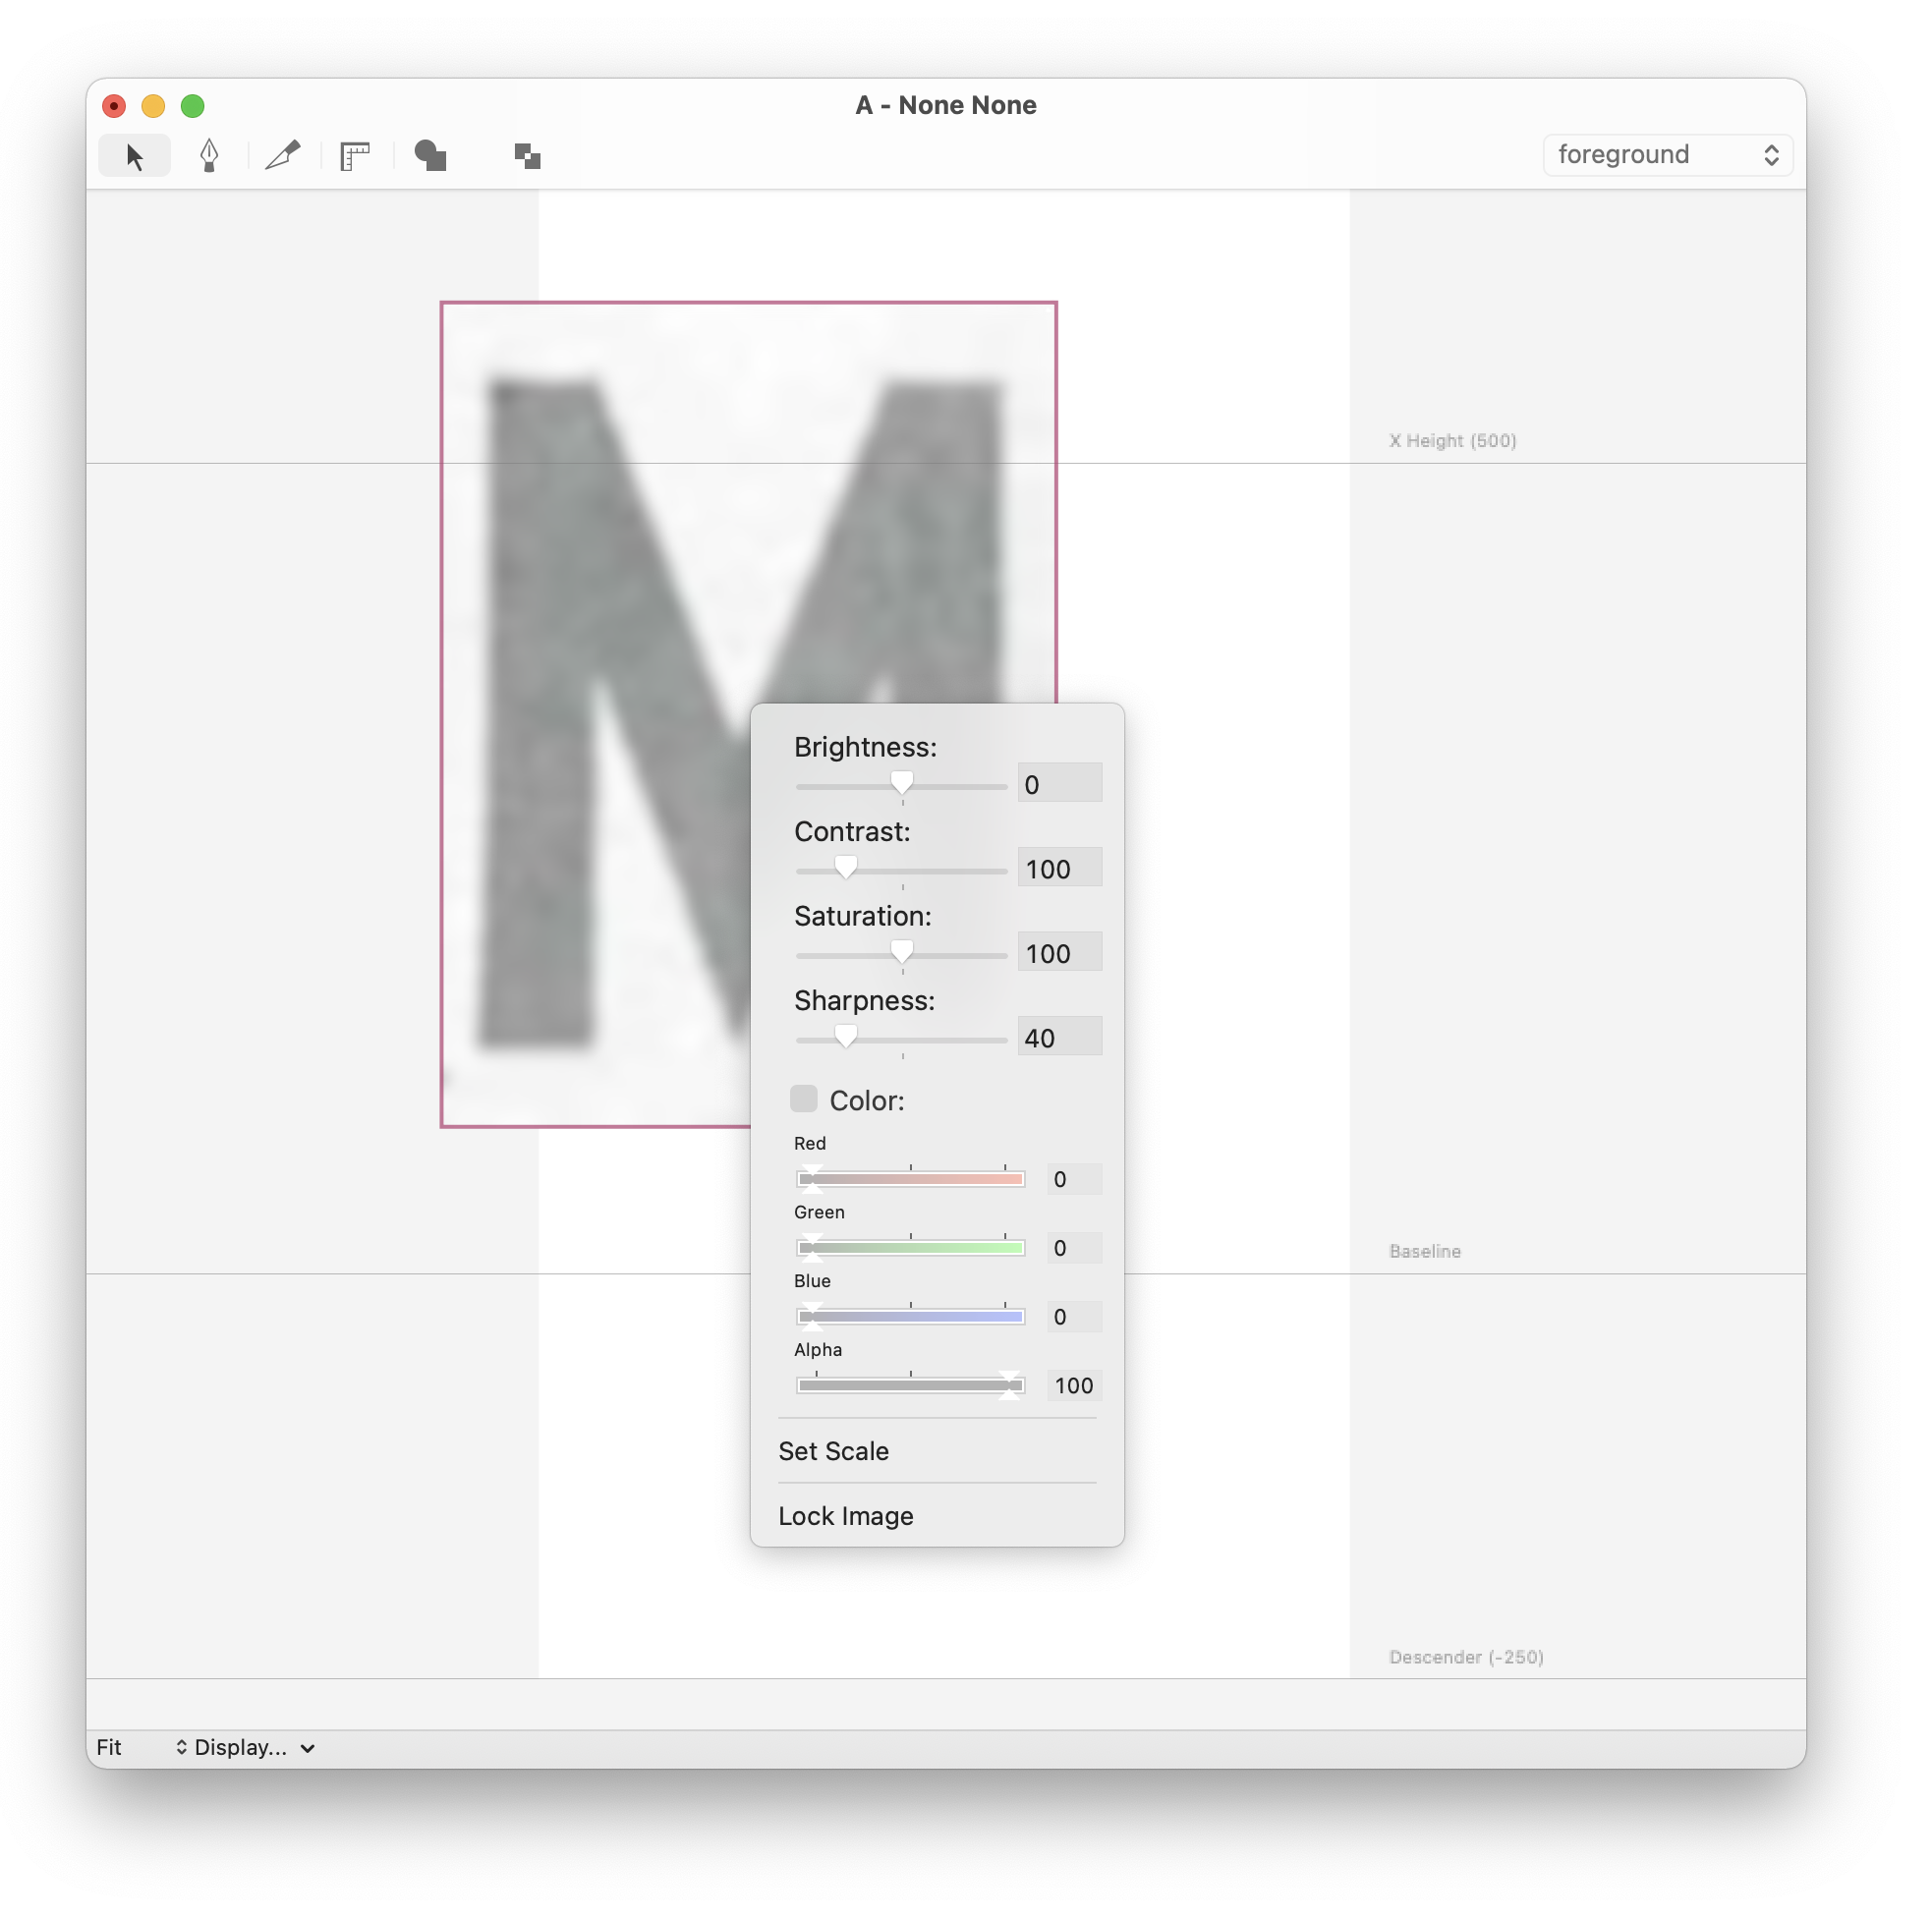
Image color, opacity and scale can be adjusted using a contextual menu, which can be opened by right-clicking in the Glyph View using the Editing Tool.
| action | description |
|---|---|
| Brightness | Adjust the brightness of the image. |
| Contrast | Adjust the contrast of the image. |
| Saturation | Adjust the saturation of the image. |
| Sharpness | Adjust the Sharpness of the image. |
| Color | Colorize the image. Use the Red, Green, Blue & Alpha sliders to adjust the color. |
| Set Scale | Opens the Set Scale sheet to adjust image size and positioning. |
| Lock Image | Locks the image, to prevent it from being edited accidentally while editing the contours. Use the contextual menu to unlock it. |
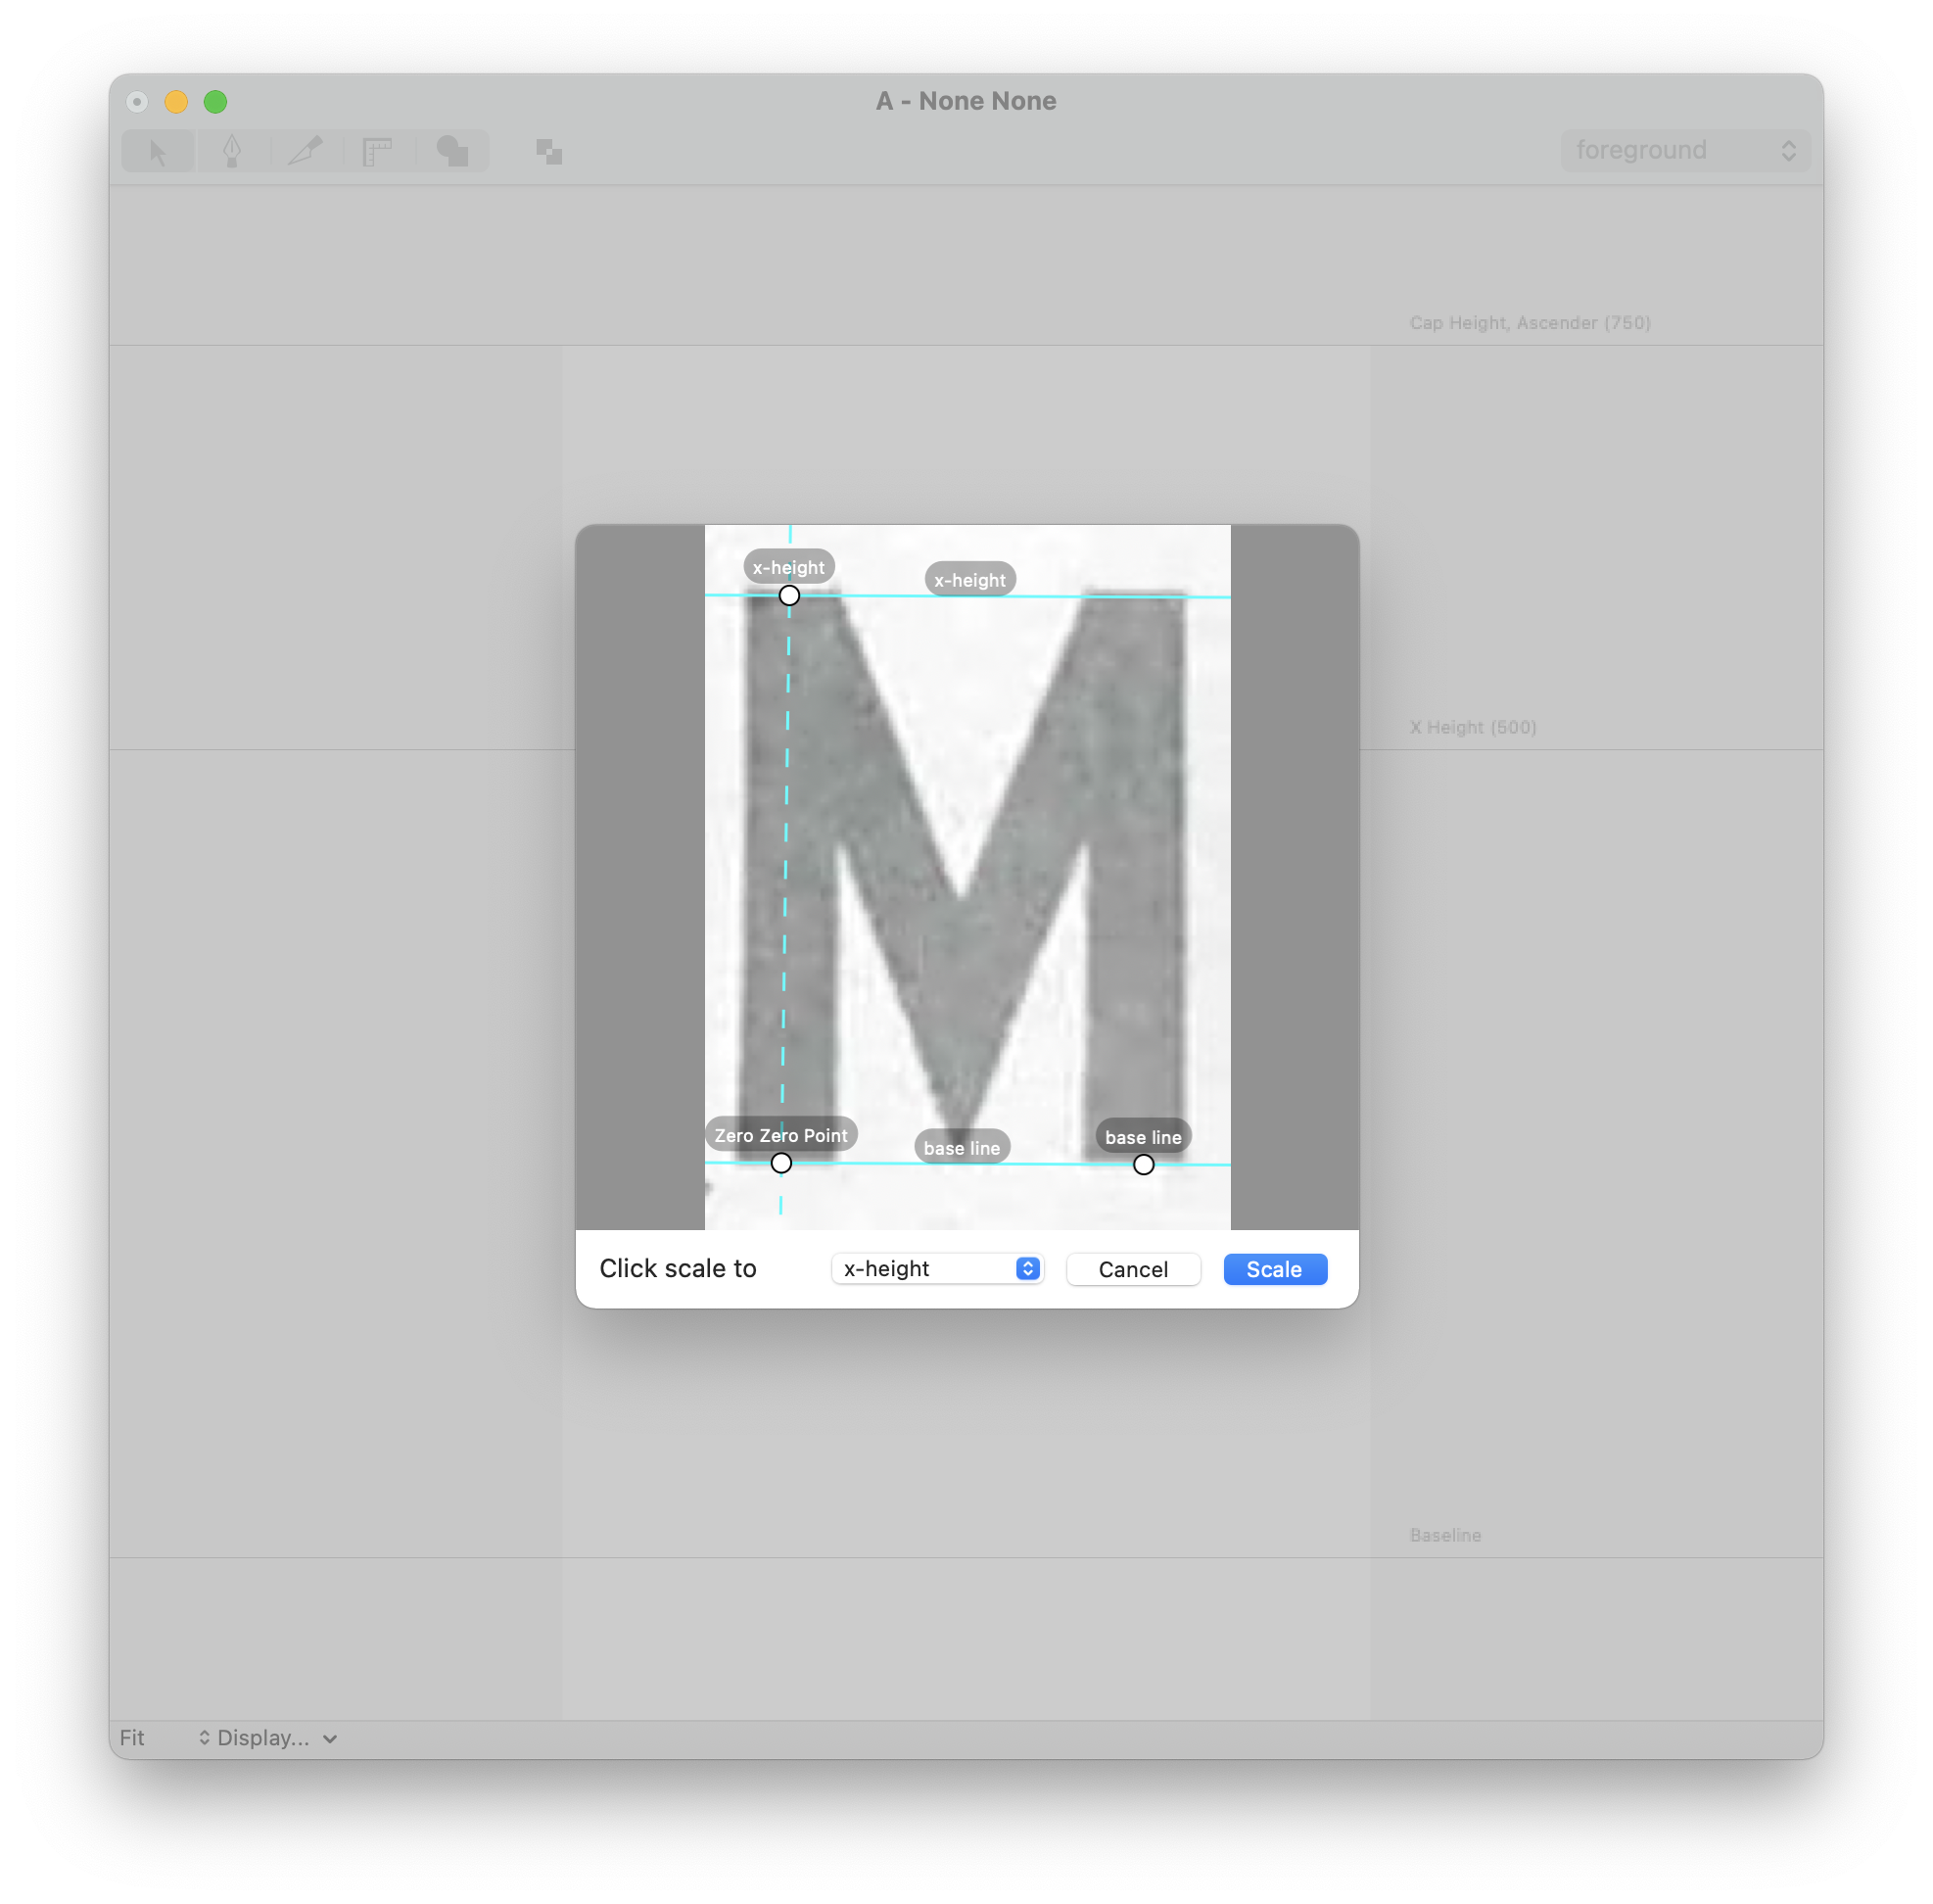
Set Scale sheet
The Set Image Scale sheet is a helper to adjust an image to the glyph’s coordinate space. It can be opened by choosing Set Scale from the contextual menu.
The sheet makes it easy to transform an image by clicking on 3 reference points:
-
The origin point, or
(0, 0). -
A point along the baseline. This will define the horizontal axis.
-
A point along the vertical axis, to define the height of the image. This point can be located at the x-height, cap-height, ascender or descender.
These positions are editable and can be fine tuned after they have been created – just click on a point to move it.
Click on the Scale button to apply the settings. The image will be transformed to match the positions defined by the 3 points.